
Quick Chandelier Tutorial
 so, i had a bit of a bedroom panic the other day. does this ever happen to you? one day i just woke up, looked around the room, and went "ugh". it was obvious that the bedroom got shifted to last place in the priority line. no art on the walls, a cream comforter with no headboard and no superfluous pillows.
i mean nothing says luxury and comfort like superfluous pillows. so in one afternoon i had a redesign panic and i totally made over our bedroom while the cap'n was out, well, cap'ning.
i'll show more pieces soon, but here is a quick view of one little project- the freshened lighting fixture. since we're in a rental it come with some standard domes for the lighting fixtures. blech. so, i decided to (on the cheap) make up a quick polka-dot chandelier. Sooo easy, sooo quick!
 Wanna make one too?
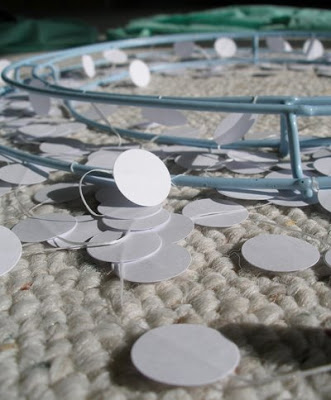
1- thrift a circular item. i def. got a bit of luck here. i knew i needed something circular as the base and i thought i would have to refashion a hangar into a circle. but no need! i found a multi-tiered circular thing at my local thrift for $0.50. i think it was possibly a piece to the base of a christmas tree stand? no idea. anyway, lucky me! (i have been advised it is probably a wreath frame/base- that def. makes sense!)
2. buy 2 packs of circle sticker labels and 2 boxes of white dental floss (i went for non-minty).
3. cut one length of dental floss and start sticking the circle stickers together, sandwiching the floss in the center. it works really well if you have a nice clean, flat surface and you can lay out several lengths of floss at a time and just go to town with the stickers. make sure that you evenly space the stickers so it comes out neat. i just cut a piece of the box the floss came in to be my measuring length and it worked fine.
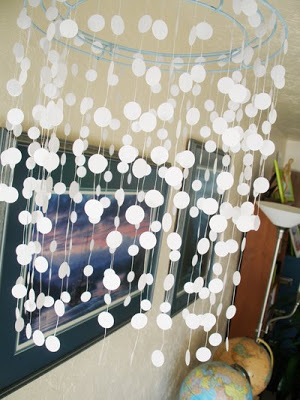
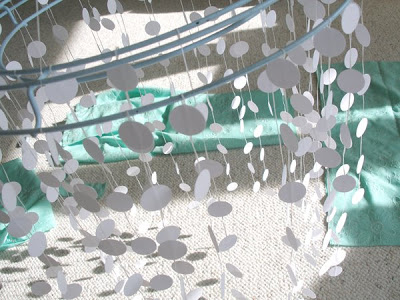 4. make 20 or so of one length of circles. i think mine had an inner row of 20 with 10 circles each and an outer row of 20 with 6 circles each. attach them to your ring by wrapping one end of the floss over the ring and then sandwiching the end and the main floss between two circles right below the ring. perhaps i shall try to take pics of this for more clarity.
5. use floss or fishing line to hang your masterpiece.
eventually mine did make it to the bedroom light fixture, but it was so pretty in the sun we left it up in the living room for a few days. have fun!!